How To Set Up A Validator For Automata ContextFree On OnFinality
Set up your own Validator for the Automata ContextFree network via OnFinality, which will enable you to start staking and earn rewards on the network!

OnFinality is a blockchain infrastructure platform that saves web3 builders time and makes their lives easier. We deliver easy-to-use, reliable and scalable API endpoints for the biggest blockchain networks and empower developers to automatically test, deploy, scale and monitor their own blockchain nodes in minutes.
We are already supporting over 60 networks across Layer-1 ecosystems such as Polkadot, Avalanche and Cosmos, and are continuously expanding these mission-critical services to other ecosystems to help developers build the decentralised future, faster!
Introduction
In this How-To Guide, you will learn how to set up your own Validator for the Automata ContextFree network, which will enable you to start staking and earn rewards on the network. This guide should be used alongside the official Automata ContextFree guide which is kept up to date and more detailed.
Automata ContextFree
ContextFree is the canary network of Automata’s Mainnet, a privacy middleware platform built for Web 3.0. CTX are ContextFree tokens and purposefully hold no economic value.
Context Free has a faucet where you can claim CTX tokens for free. The circulation amount is set at 1 billion and is minted on demand.
Why run a validator for Automata ContextFree
Validators play a crucial role in securing the Automata ContextFree network.
ContextFree provides a pre-production environment for real-life learnings to be applied to the eventual rollout of the Mainnet. During this time, users are invited to battle-test the code.
Useful Links
https://docs.ata.network/canarynet/getstarted/introduction/
Disclaimer
Running a Collator or Validator comes with a high risk and requires a high level of technical knowledge and skill. As per our Terms of Service, OnFinality is neither responsible for any rewards nor losses, such as from slashing, incurred when running a Validator or Collator node on OnFinality. Users should read and fully understand the relevant documentation for the Network before setting up the node, and get in touch directly with the Network if they have any questions or concerns.
HOW TO SET UP A VALIDATOR
1. Log in to OnFinality
Create an account and log in to OnFinality, then add a payment method.
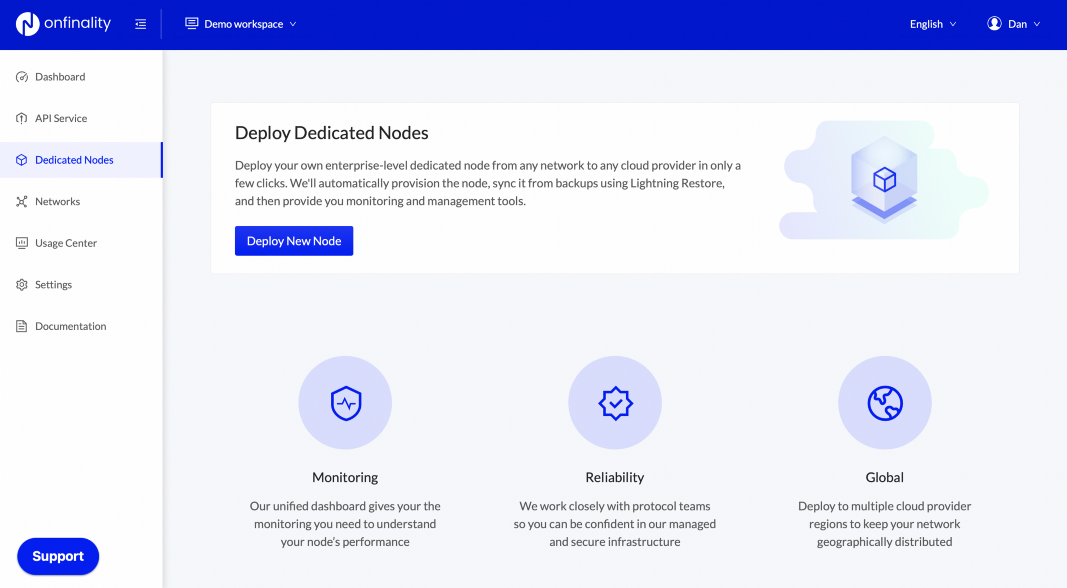
2. Create Dedicated Node
Select the Dedicated Nodes menu and press Deploy New Node
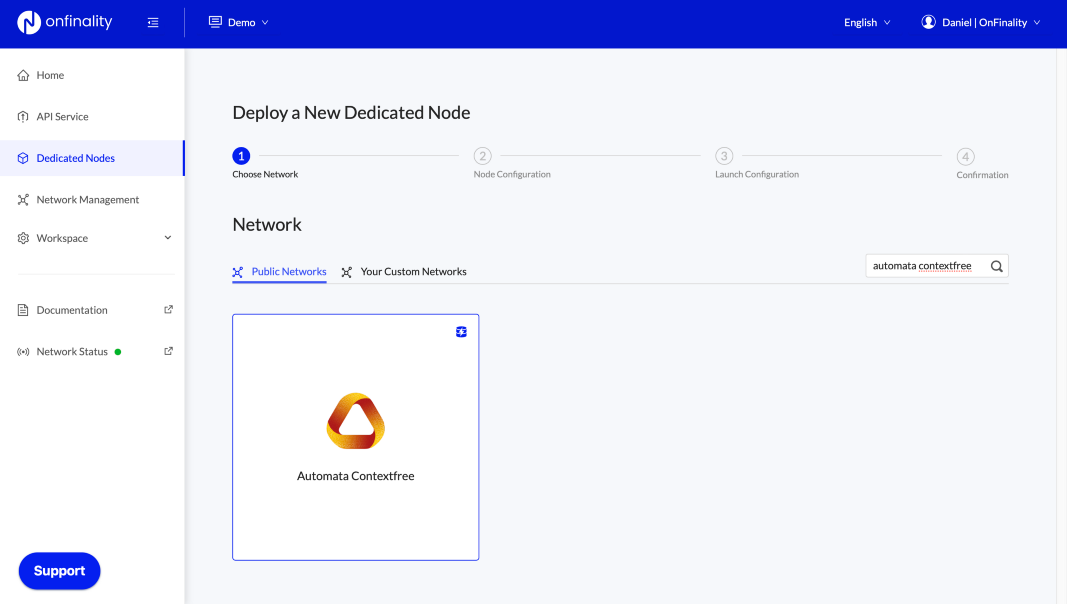
2.1 Select network
Search for and then select the Automata ContextFree network
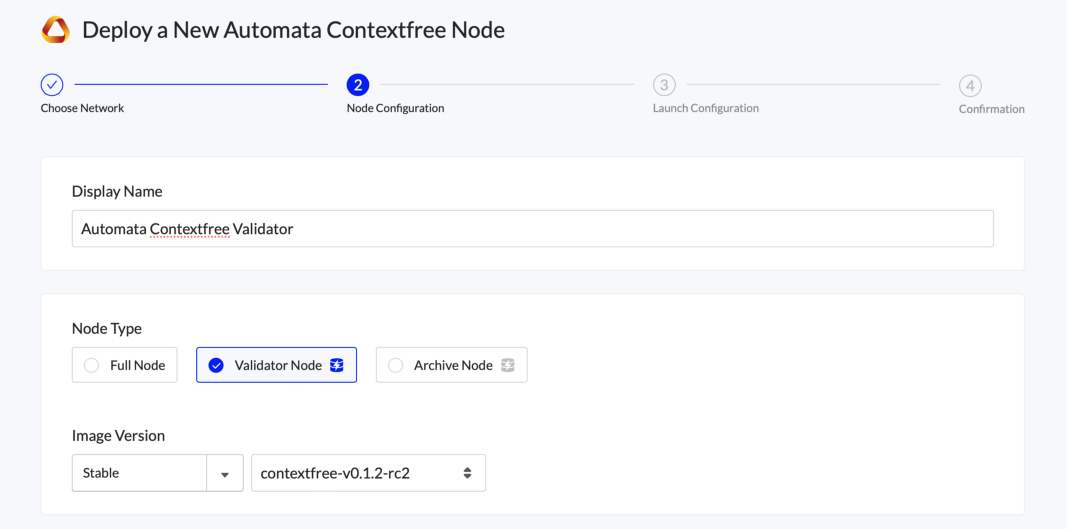
2.2 Configure Node
Enter an easily identifiable Display Name and select Node Type Validator. Select the latest Image Version
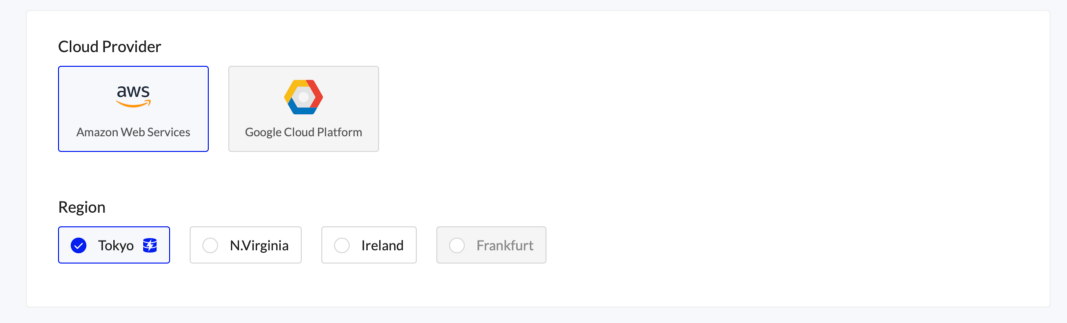
Scroll down to set the Cloud Provider and Region where you will run the node. Networks may have a preference of where you should run your validator or collator, so check with their official documentation.
Look out for the Lightning Restore indicator to get the node running as fast as possible.
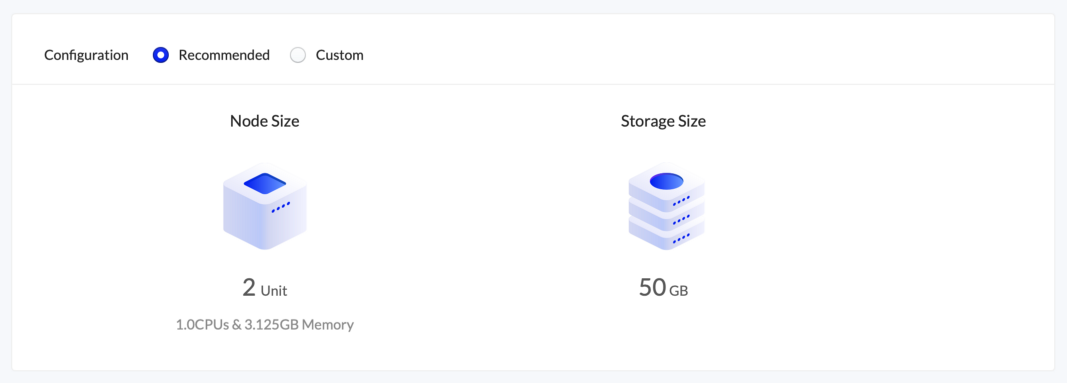
Use at least the recommended configuration suggested by the network, then press Next
2.3 Configure Launch Arguments
Next, review the node’s Launch Configuration. The recommended settings are usually sufficient, but we recommend comparing with the Automata ContextFree documentation to be certain.
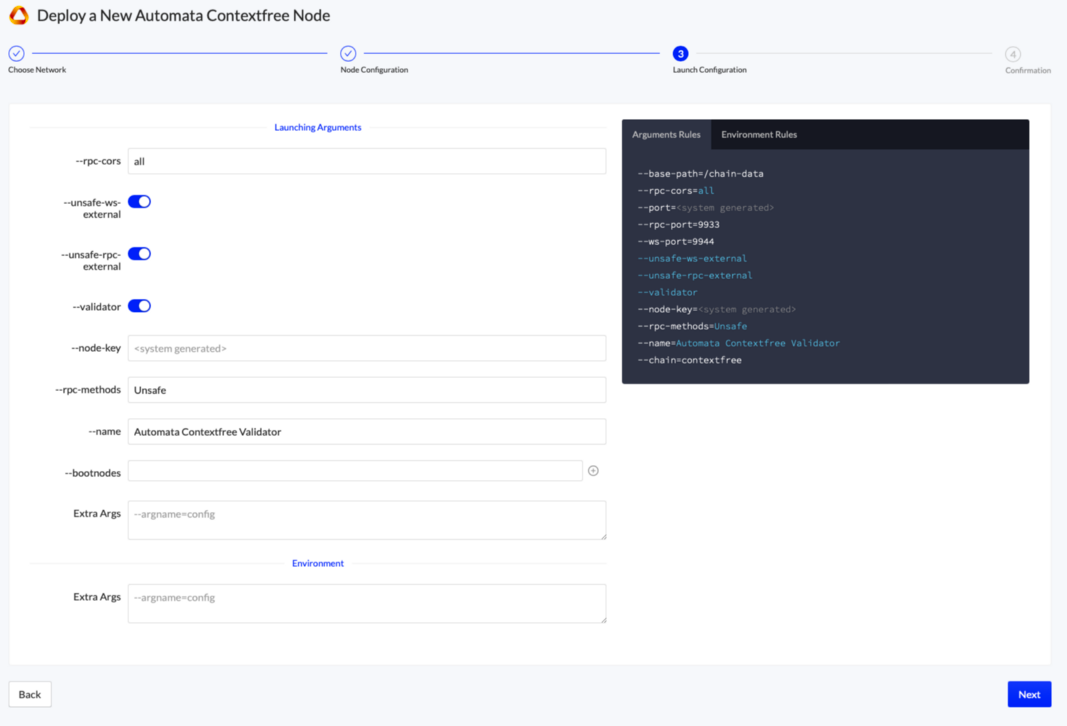
Press Next
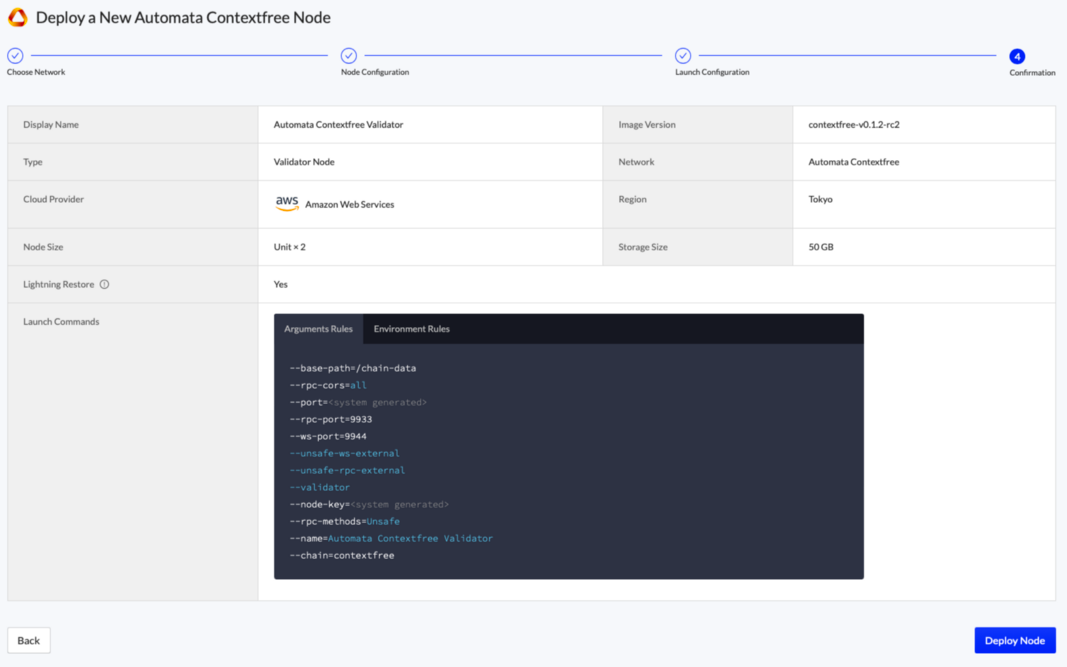
2.4 Review Node
Finally, review the node’s settings and press Deploy Node
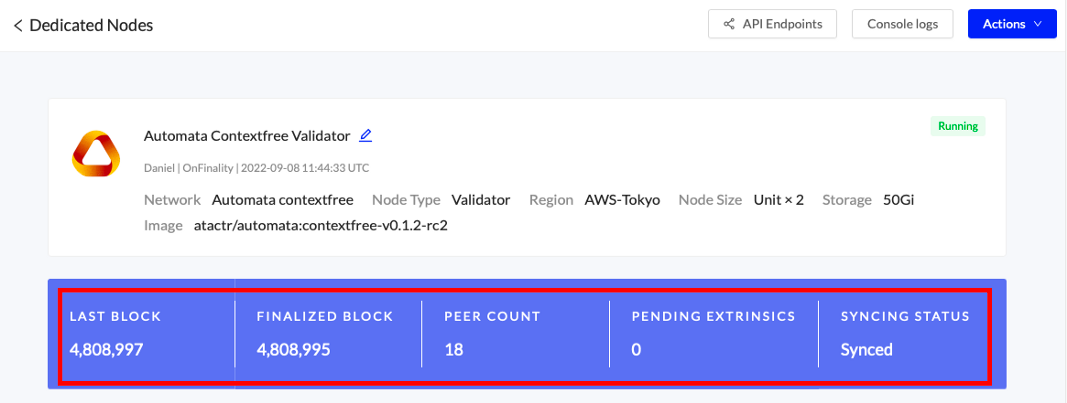
3. Sync your Dedicated Node
Once your node is successfully deployed, you can find it in the “Dedicated Nodes” section on our portal. Click on your node and confirm the following:
- Relay chain/parachain blocks are syncing appropriately
- No configuration errors in the console log. You can find your console by clicking on “Console logs” on the top right hand.
- CPU, Memory, and Storage are within reasonable range of use.
You can cross-reference the respective network blocks on the PolkadotJS App.
4. Set up Accounts and Stake
To run a validator you will need to set up two accounts:
Stash account
This account holds funds bonded for staking, but delegates some functions to the Controller account. It can be kept in a cold wallet, meaning it can stay offline all the time.
Controller account
This account acts on behalf of the Stash account, signalling decisions and necessary execution for staking. It only needs enough funds to pay transaction fees.
Follow the Automata ContextFree instructions set up your stake.
5. Generate Session Keys
Session keys are what links the validator or collator to your account.
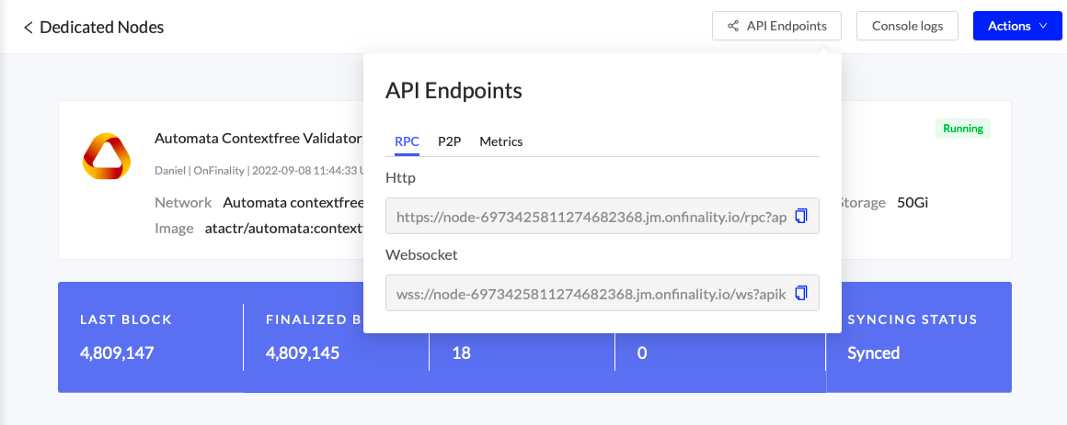
First, locate your Dedicated Node’s RPC endpoints under API Endpoints. Access is secured by an API Key at the end of the URL, so keep it safe and private.
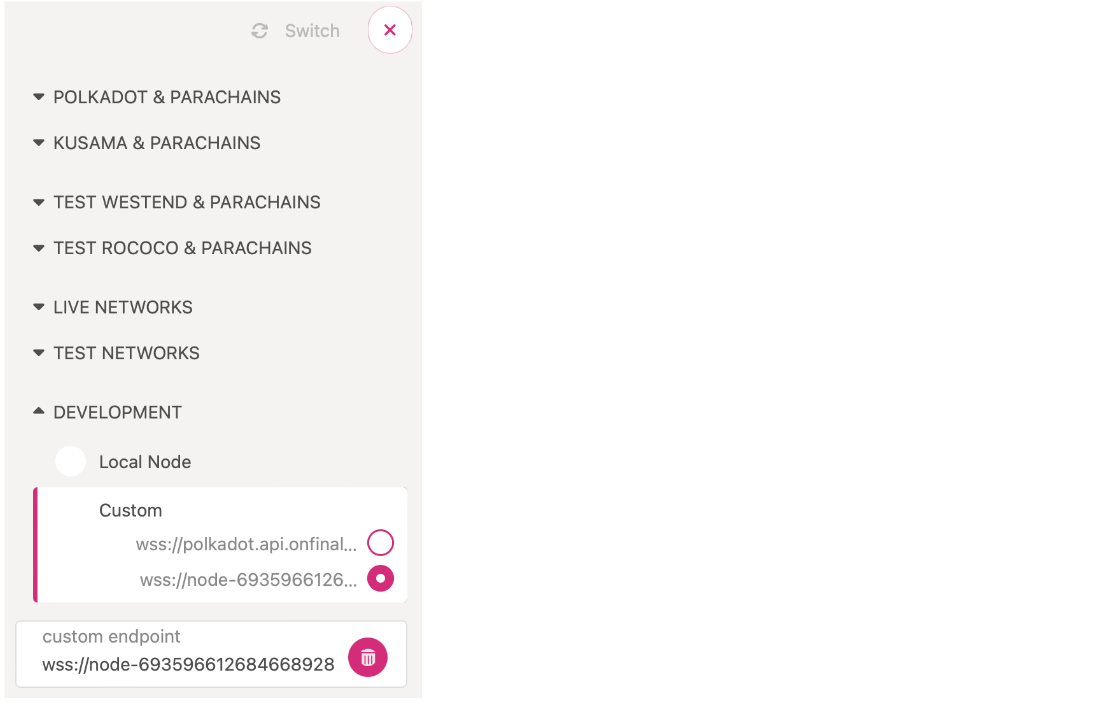
Option 1 — Polkadot-JS:
Copy your RPC — Websocket endpoint into the Polkadot-JS Custom Endpoint and press save to connect to the node
Navigate to Developer > RPC Calls and submit an author rotateKeys call.
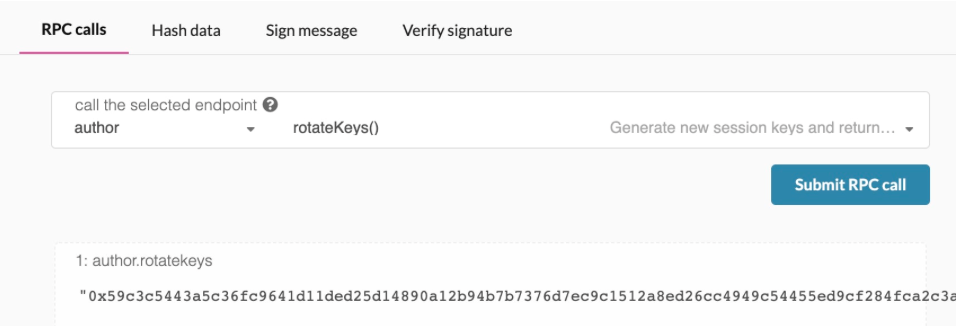
Record the result.
Option 2 — CLI:
Generate the session keys on your Dedicated Node via the author_rotateKeys RPC Request, using your Dedicated Node’s RPC — Http url.
Example request
curl **Node’s RPC Http endpoint here** -H \ “Content-Type:application/json;charset=utf-8” -d \
‘{
“jsonrpc”:”2.0",
“id”:1,
“method”:”author_rotateKeys”,
“params”: []
}’
You will get a response like this
{
“jsonrpc”: “2.0”, “result”:”0xc05a9d093e4db4c1bde31977716e7a0a39d6f3d1f1bf749e7fec8371147de730af6860aeef81a11130c9fcd317b96e736f6c36141c28f382a18f9faf6e7df797eaa951ead00d12db10937003f0956e3d3444d1774d452ed045dbc1b84d1bf1471abf5d77bf5033845f01be1188a852c6f0ba703042b4d06d14314841c1096c50",
“id”:1
}
The content after “result” is the session keys of your validator node.
6. Set Session Keys
Next, you will need to link the session keys to your account on-chain using the response from author_rotateKeys.
In polkadot-js, Open Network > Staking
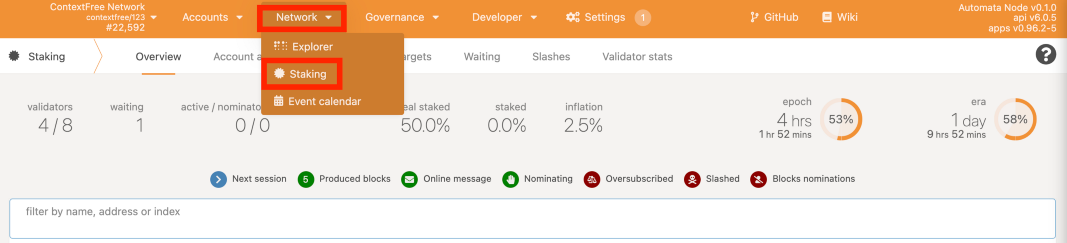
Click Session Keys and enter the session keys from step 3

7. Configure your Validator
Finally, you will need to configure your validator’s settings, such as the session keys, stake value, and commission, on chain.
Click Validate

Set the value of reward commission percentage, which is the rate that your validator will be commissioned with. The remaining rewards will be split among your nominators.
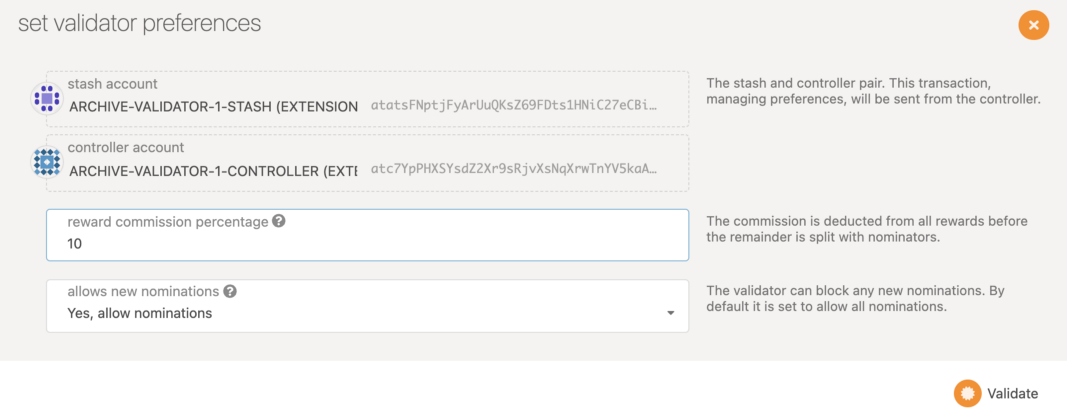
Choose whether to accept new nominations and Press Validate
The validator set is refreshed every era. In the next era, if there is a slot available and your node is selected to join the validator set, your node will become an active validator.
Congratulations
If you have followed all of these steps, and been selected to be a part of the validator set, you are now running a ContextFree validator!
Resources:
Developer documentation: https://documentation.onfinality.io/support/
About OnFinality
OnFinality is a blockchain infrastructure platform that saves web3 builders time and makes their lives easier. OnFinality delivers scalable API endpoints for the biggest blockchain networks and empowers developers to automatically test, deploy, scale and monitor their own blockchain nodes in minutes. To date, OnFinality has served over 250 billion RPC requests across 60 networks including Polkadot, Kusama, Moonbeam, Astar, Avalanche and Cosmos, and is continuously expanding these mission-critical services so developers can build the decentralised future, faster!